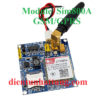
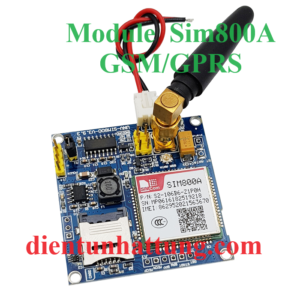
MODULE SIM900A MINI, GSM/GPRS GỌI ĐIỆN VÀ NHẮN TIN
250.000 ₫
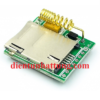
Module sim900A mini dùng điều khiển thiết bị hoặc cảnh báo từ xa thông qua mạng di động như gọi điện, nhắn tin, GPRS.
| Điện áp hoạt động: | 5V |
| Dòng tiêu thụ: | 1A |
| Công suất: | 5W |
| Loại sản phẩm: | Module |
| Chuẩn giao tiếp: | uar |
Out of stock
Giới thiệu Module sim900A Mini
Module sim900A mini dùng điều khiển thiết bị hoặc cảnh báo từ xa thông qua mạng di động như gọi điện, nhắn tin, GPRS.
Dễ giao tiếp với các họ vi điều khiển như Pic, 8051, AVR, Arduino…
Module Sim900A được ứng dụng rộng rãi ngoài thực thế,các phòng thông minh, ngôi nhà thông minh, IOT…
Điều khiển module sử dụng bộ tập lệnh AT dễ dàng và tiêu thụ điện năng nhỏ phù hợp cho các đồ án hoặc dư án cần dùng Pin hoặc Acquy
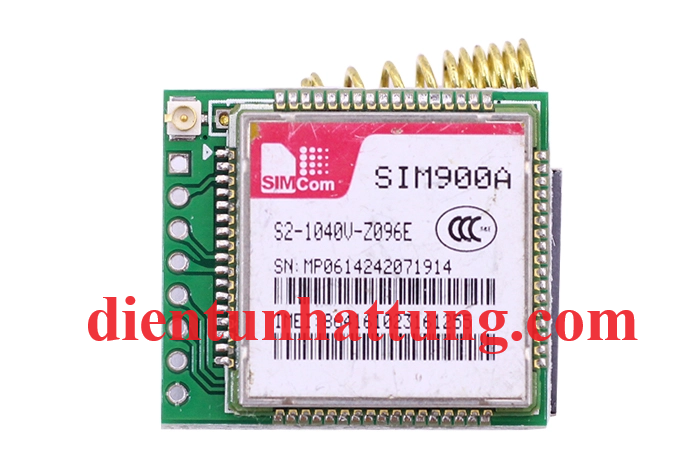

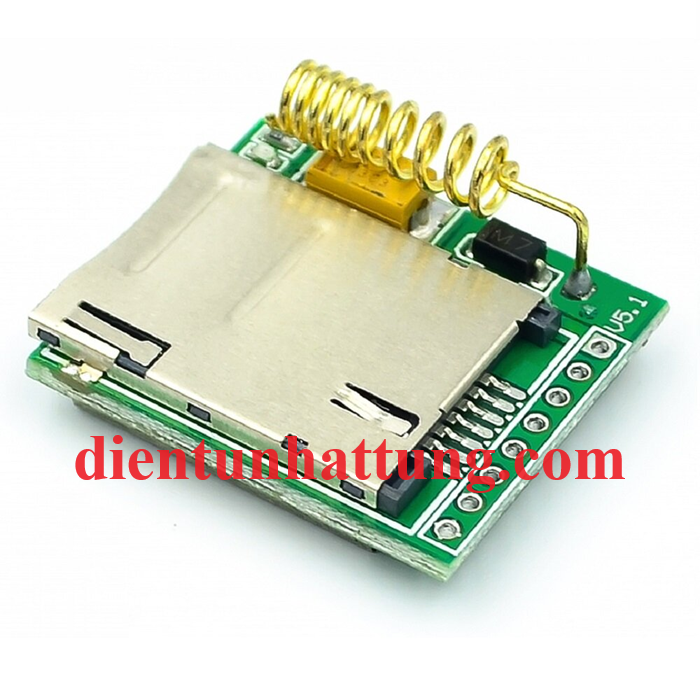
Cách gắn sim vào Module Sim900A mini
Nên sử dụng sim của nhà mạng lớn như Viettel, Mobi, Vina,…. để đường truyền được ổn định
Thông số kỹ thuật Module sim900A
- Điện áp hoạt động : 4.2V
- Dòng điện hoạt động : 100mA – 1A (Nên chọn nguồn trên 1A)
- Dòng ở chế độ chờ : 10mA
- Công suất : 4.2W
- Chuẩn truyền : UART
- Nhiệt độ hoạt động : -10°C – 60°C
- Số chân : 12
- Loại : Module
- Loại Sim : Sim thường
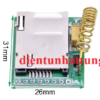
- Kích thước : 31mm*26mm
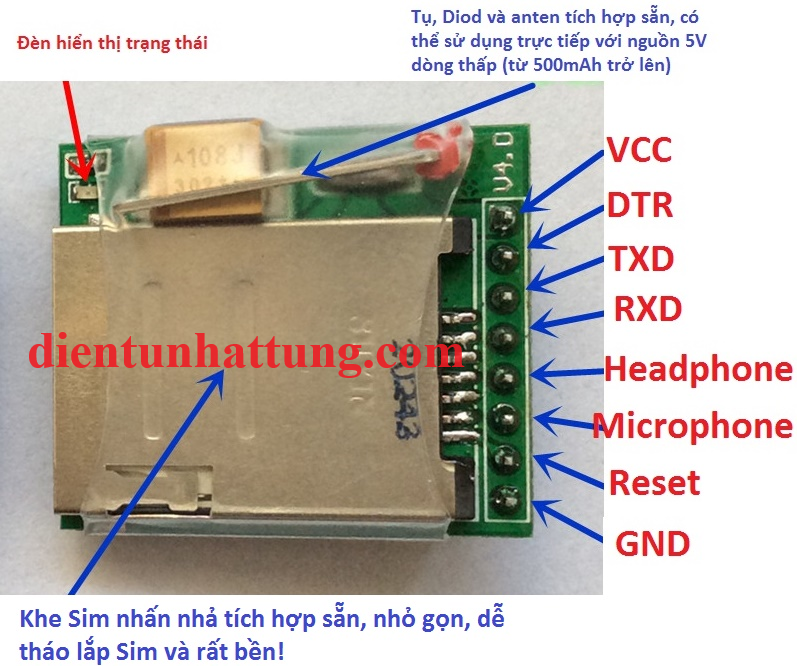
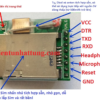
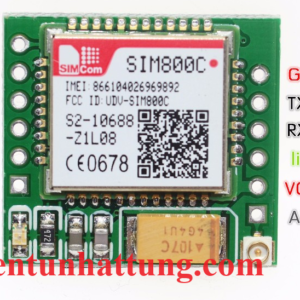
Chức năng các chân của module sim900A mini
- VCC : Nguồn vào 4.2V.
- DTR : Chân UART DTR, thường không xài.
- TXD : Chân truyền Uart TX.
- RXD : Chân nhận Uart RX.
- Headphone : ngõ ra âm thanh, nối với loa để phát âm thanh.
- Microphone : ngõ vao âm thanh, phải gắn thêm Micro để thu âm thanh.
- Reset : Chân khởi động lại Sim800L (thường không xài).
- GND : Chân Mass, cấp 0V.
Tập lệnh AT của module sim900A mini cần giao tiếp vi điều khiển
Các lệnh chung
- Lệnh: AT<CR><LF>
- Mô tả : Kiểm tra đáp ứng của Module Sim 900A, nếu trả về OK thì Module hoạt động
- Lệnh: ATE[x]<CR><LF>
- Mô tả: Chế độ echo là chế độ phản hồi dữ liệu truyền đến của module Sim 900A,
x = 1 bật chế độ echo , x = 0 tắt chế độ echo (bạn nên tắt chế độ này khi giao tiếp với vi điều khiển)
- Lệnh: AT+IPR=[baud rate]<CR><LF>
- Mô tả: cài đặt tốc độ giao tiếp dữ liệu với Module Sim800C, chỉ cài được các tốc độ sau
- baud rate : 0 (auto), 1200, 2400, 4800, 9600, 19200, 38400, 57600, 115200
- Lệnh: AT&W<CR><LF>
- Mô tả : lưu lại các lệnh đã cài đặt
Các lệnh điều khiển cuộc gọi
- Lệnh: AT+CLIP=1<CR><LF>
- Mô tả: Hiển thị thông tin cuộc gọi đến
- Lệnh: ATD[Số_điện_thoại];<CR><LF>
- Mô tả: Lệnh thực hiện cuộc gọi
- Lệnh: ATH<CR><LF>
- Mô tả: Lệnh thực hiện kết thúc cuộc gọi , hoặc cúp máy khi có cuộc gọi đến
- Lệnh: ATA<CR><LF>
- Mô tả: Lệnh thực hiện chấp nhận khi có cuộc gọi đến
Các lệnh điều khiển tin nhắn
- Lệnh: AT+CMGF=1<CR><LF>
- Mô tả: Lệnh đưa SMS về chế độ Text , phải có lệnh này mới gửi nhận tin nhắn dạng Text
- Lệnh: AT+CMGS=”Số_điện _thoại”<CR><LF>
- Gửi mã Ctrl+Z hay 0x1A hoặc giá trị 26 để kết thúc nội dung và gửi tin nhắn
- Mô tả: Lệnh gửi tin nhắn
- Lệnh: AT+CMGR=x<CR><LF>
- x là địa chỉ tin nhắn cần đọc
- Mô tả: Đọc một nhắn vừa gửi đến, lệnh được trả về nội dung tin nhắn, thông tin người gửi, thời gian gửi
- Lệnh: AT+CMGDA=”DEL ALL”<CR><LF>
- Mô tả: Xóa toàn bộ tin nhắn trong các hộp thư
- Lệnh: AT+CNMI=2,2<CR><LF>
- Mô tả: Hiển thị nội dung tin nhắn ngay khi có tin nhắn đến
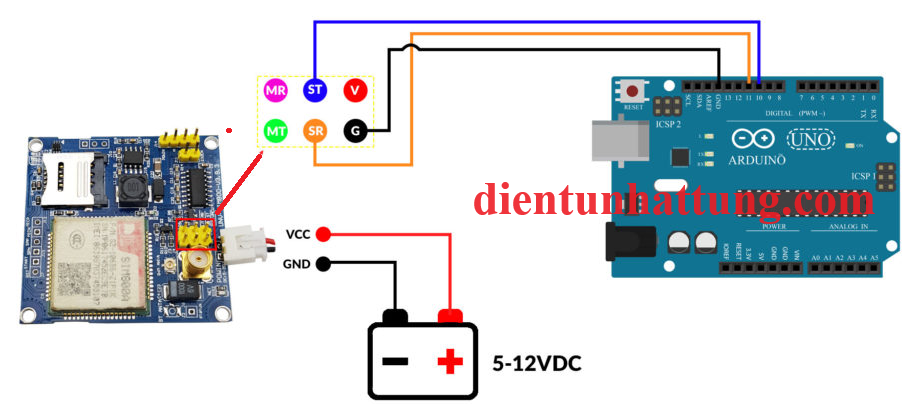
Chương trình Test
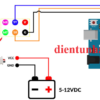
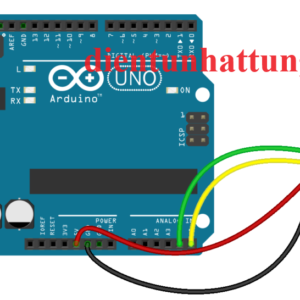
Nguyên lý kết nối
Chương trình
Chương trình Gửi tin nhắn
#include <SoftwareSerial.h>

//Create software serial object to communicate with SIM800L
SoftwareSerial mySerial(3, 2); //SIM800L Tx & Rx is connected to Arduino #3 & #2

void setup()
{
  //Begin serial communication with Arduino and Arduino IDE (Serial Monitor)
  Serial.begin(9600);

  //Begin serial communication with Arduino and SIM800L
  mySerial.begin(9600);

  Serial.println("Initializing...");
  delay(1000);

  mySerial.println("AT"); //Once the handshake test is successful, it will back to OK
  updateSerial();

  mySerial.println("AT+CMGF=1"); // Configuring TEXT mode
  updateSerial();
  mySerial.println("AT+CMGS=\"+ZZxxxxxxxxxx\"");//change ZZ with country code and xxxxxxxxxxx with phone number to sms
  updateSerial();
  mySerial.print("Last Minute Engineers | lastminuteengineers.com"); //text content
  updateSerial();
  mySerial.write(26);
}

void loop()
{
}

void updateSerial()
{
  delay(500);
  while (Serial.available())
  {
    mySerial.write(Serial.read());//Forward what Serial received to Software Serial Port
  }
  while(mySerial.available())
  {
    Serial.write(mySerial.read());//Forward what Software Serial received to Serial Port
  }
}
Chương trình Nhận tin nhắn
#include <SoftwareSerial.h>

//Create software serial object to communicate with SIM800L
SoftwareSerial mySerial(3, 2); //SIM800L Tx & Rx is connected to Arduino #3 & #2

void setup()
{
  //Begin serial communication with Arduino and Arduino IDE (Serial Monitor)
  Serial.begin(9600);

  //Begin serial communication with Arduino and SIM800L
  mySerial.begin(9600);

  Serial.println("Initializing...");
  delay(1000);

  mySerial.println("AT"); //Once the handshake test is successful, it will back to OK
  updateSerial();

  mySerial.println("AT+CMGF=1"); // Configuring TEXT mode
  updateSerial();
  mySerial.println("AT+CNMI=1,2,0,0,0"); // Decides how newly arrived SMS messages should be handled
  updateSerial();
}

void loop()
{
  updateSerial();
}

void updateSerial()
{
  delay(500);
  while (Serial.available())
  {
    mySerial.write(Serial.read());//Forward what Serial received to Software Serial Port
  }
  while(mySerial.available())
  {
    Serial.write(mySerial.read());//Forward what Software Serial received to Serial Port
  }
}
Chương trình Gọi điện
#include <SoftwareSerial.h>

//Create software serial object to communicate with SIM800L
SoftwareSerial mySerial(3, 2); //SIM800L Tx & Rx is connected to Arduino #3 & #2

void setup()
{
  //Begin serial communication with Arduino and Arduino IDE (Serial Monitor)
  Serial.begin(9600);

  //Begin serial communication with Arduino and SIM800L
  mySerial.begin(9600);

  Serial.println("Initializing...");
  delay(1000);

  mySerial.println("AT"); //Once the handshake test is successful, i t will back to OK
  updateSerial();

  mySerial.println("ATD+ +ZZxxxxxxxxxx;"); //  change ZZ with country code and xxxxxxxxxxx with phone number to dial
  updateSerial();
  delay(20000); // wait for 20 seconds...
  mySerial.println("ATH"); //hang up
  updateSerial();
}

void loop()
{
}

void updateSerial()
{
  delay(500);
  while (Serial.available())
  {
    mySerial.write(Serial.read());//Forward what Serial received to Software Serial Port
  }
  while(mySerial.available())
  {
    Serial.write(mySerial.read());//Forward what Software Serial received to Serial Port
  }
}
Chương trình Nhận cuộc gọi đến
#include <SoftwareSerial.h>

//Create software serial object to communicate with SIM800L
SoftwareSerial mySerial(3, 2); //SIM800L Tx & Rx is connected to Arduino #3 & #2

void setup()
{
  //Begin serial communication with Arduino and Arduino IDE (Serial Monitor)
  Serial.begin(9600);

  //Begin serial communication with Arduino and SIM800L
  mySerial.begin(9600);

  Serial.println("Initializing...");
}

void loop()
{
  updateSerial();
}

void updateSerial()
{
  delay(500);
  while (Serial.available())
  {
    mySerial.write(Serial.read());//Forward what Serial received to Software Serial Port
  }
  while(mySerial.available())
  {
    Serial.write(mySerial.read());//Forward what Software Serial received to Serial Port
  }
}
Liên hệ làm mạch
- Phone: 0967.551.477
- Zalo: 0967.551.477
- Email: dientunhattung@gmail.com
- Địa Chỉ: 171/25 Lê Văn Thọ, P8, Gò Vấp, Tp HCM
- Chi tiết : Nhận làm mạch và hướng dẫn đồ án sinh viên
Tham khảo chương trình mẫu và thông tin linh kiện chi tiết tại:
Only logged in customers who have purchased this product may leave a review.









Reviews
There are no reviews yet.